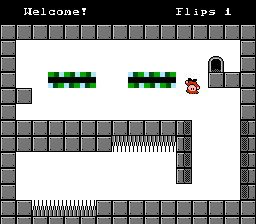
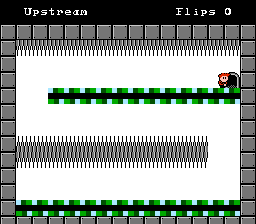
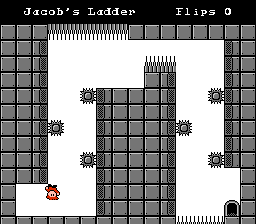
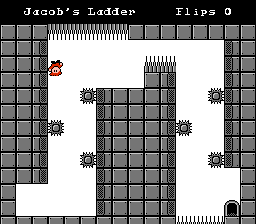
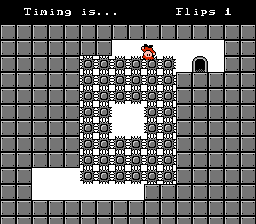
I Wanna Flip The Sky is a homebrew NES platformer game, along the lines of I Wanna Be The Guy and Battle Kid, developed by Tom Livak in August 2012 for the NEO Flash contest. There are 12 one-screen levels where players must avoid spikes, walk on conveyor belts, and walljump on specifically marked walls to make it to the exit door; players are given the ability to flip a number of times in each level.
Download the game here. (Rest assured the run will still sync; it's just a "title screen" fix according to Tom)
This TAS was originally made in July 2018 to one-up
티어 (chatterbox)'s efforts (which is currently unlisted as of this writing). Later on October 2024, I decided to go back and optimize it, and I managed to save 41 frames, taking almost four hours off and on to complete the run. This would then be the run that I am submitting today.
Controls
Left and Right: Move left and right in an empty field of the level (the obvious controls). Up and Down do not do anything.
A: Jump, either from the ground or from a marked wall. Your maximum jumping height is a little over two tiles, but your jump height is determined by how long you hold A.
B: Flip (unless you have zero flips remaining). Controls with the directional pad's Left and Right key remain the same; you will just be upside-down (jumping down, falling up) or right-side-up (jumping up, falling down).
Select: Suicide, sending you back to the start. This is only useful if you're stuck with no flips remaining, but the button may also serve as a substitute for the Start button.
Start: Required to advance through pre-game and post-game screens. The button does nothing else during the game.
Obstacles
Normal tiles: Nothing special about them. You can walk on them, hug them, and hit them with your head.
Spikes: Typically the only real dangers in the game. They may come either attached to normal tiles or airborne; some may either flicker on and off. Either way, touching one will instakill you, sending you back to the start of the level.
Marked walls: These walls allow you to walljump off of them.
Conveyor belts: Standing on one of them will move you in the direction the green palettes are moving in. They match the same movement speed as you (two pixels per frame), so if you try to move in the opposite direction, you will not be moving at all; if you move in the same direction, you will move twice as fast (four pixels per frame). Interestingly, if you hit your head on the conveyor belt or touch it from the side (at the top or bottom edges), you will also move two pixels in the direction of the conveyor belt.
Exit door: Touching this advances you to the next level; eight pixels on the residing tile will suffice.
Techniques
Horizontal movement speed
- Horizontal movement speed is constant, and you normally move two pixels per frame (this is affected by the conveyor belts).
- When walljumping, your horizontal movement speed boosts to four pixels per frame for nine frames after making the initial walljump, during which you have no control over your horizontal speed.
Vertical movement speed
- When you first jump, you first go up (or down) at three pixels per frame, which is the maximum. That speed then slows down until it reaches falling speed or you hit your head, in which you start going down (or up). Falling speed quickly after can reach four pixels per frame, but can be interrupted once you land. When flipping, jumping speed becomes falling speed, and vice versa.
- The deceleration of the jump's rising speed can depend on when you hold A and for how long, similar to that of Super Mario Bros. 3. I don't know how it works specifically, but I know this: while you're holding A, deceleration is slowed down; when you're not holding A, deceleration proceeds normally. Holding A does not affect how quickly you fall.
Corner clipping
- When on the last two pixels of a ceiling, jumping without moving in a particular direction will have that particular tile push you two more pixels. The same can occur with falling on the last two pixels of a floor, but it's more dependent on your jump height. Specifically, if you are one pixel above the floor and falling at four pixels per frame, the corner clip can take effect. Otherwise, you will simply land on the floor.
- If you are on the last four pixels of any top or bottom edge, however, you can make a faster corner clip as long as you are holding the directional key that the edge is at while you're jumping or falling. e.g. if the edge is on the right side, you hold Right as you jump or fall into the corner.
Level 1: Welcome!
You're normally supposed to use the two provided flips across the gaps of spikes, perform a few walljumps, make a couple of good timings to pass the flickering spikes, and cross the conveyor belts to reach the exit door.
However, I can make one precise jump across the first gap to preserve the two flips, which then allows me to skip the rest of the level.
Compared to my 2018 run, I managed to save one frame by performing a Right press for one extra frame (Frame 253) after the initial flip to get closer to the door.
Level 2: High Dive
Here you need to do some walljumps, then fall straight down to where the door is. You also need to use your two flips to float across the spike corridor.
I make a full-ish jump at the earliest moment, and immediately start walljumping afterward; I delay the last walljump by one frame to more easily land at the top. For the drop, I corner clip slightly to fall faster.
No change compared to my 2018 run.
Level 3: Giant Slalom
A gap with three tiles; top spikes are active first, then both for a brief moment, then bottom. The cycle of course repeats; you are very much expected to switch between down and up to proceed.
In this TAS, this level is just as easy as holding right and making two well-timed flips to get across.
No change compared to my 2018 run, obviously.
Level 4: Twisty Passages
Just some tight squeezes, not much else to it. The hitboxes for these spikes are pretty stringent (considering they are essentially 16x16 tiles) and you can't make the third flip until you completely hug the left wall.
I was able to save four frames over my 2018 run.
- After the first flip, I started holding Left one frame earlier (884) to fit into the first gap, but it requires a frame-perfect flip after (888).
- At the top, I performed a frame-perfect jump (980) and two frame-perfect flips (984 and 995) to clip a corner so I could make the last two flips sooner.
- Speaking of... At the top-right, I did a four-frame jump (1028) and a flip (1031) to clip another corner.
Level 5: Upstream
The conveyor belts drag you away from the exit; you need to continually perform light hops to come closer to your goal. Too high, and you'll hit the stalactites (if that's what you wanna call them).
This is the optimal jumping pattern that I use: two-frame A → one-frame blank → one-frame A → five-frame blank → seven-frame A
Which lets me beat the level the fastest, covering the most distance per jump.
Another improvement is made here, this one by three frames.
- At the top-left corner, I clipped another corner by landing one frame earlier (1380) before the final jump to the second flip (1400). I also had to resume the jumping pattern the next frame after because I landed on the edge of the conveyor belt for a single frame; this saved two frames.
- Later on, I'd also find that I can shorten the last jump before the first flip on the bottom-right corner, allowing me to land a frame faster.
Level 6: Stop And Go
Consider this level an autoscroller, because you're constantly waiting for the spikes to be toggled off, then you march forward to the next safe spot.
I was able to skip the bottom-right and top-right safe spots, but nothing else. Also, for the second-to-last one near the center, I can perfectly align myself to that exact safe spot without the help of the above tile. Bit of a shame since I can't go any faster, but that's how it is.
No change compared to my 2018 run.
Level 7: Cannery Row
Somewhat similar to Upstream, but it now features toggling spikes that require your patience. The top conveyor belt is headed your direction past the spikes, but the bottom one is trying to push you back; time to initiate the hopping sequence again.
- On the first toggle-off, I make my way past the top spikes, stopping at the start of the next row. Then ditto for that one.
- Because the conveyor belt is now against me in the second half, I reinitiate the optimal jumping pattern from Upstream, only getting stopped by the third column of spikes. Then I made it to the very last one, and I was free afterward.
I'm faster by one frame here than in my 2018 run, in that I waited close to the last spikes so I could start jumping closer, resulting in one less jump required.
Level 8: Superman
This level is nothing but two ledges and a huge spike gap in between. You need to do multiple flips in the air, and hopefully with adequate reflexes to avoid hitting the top or the bottom. Thankfully, you have a whopping nine flips, so surely you can't go wrong with that, right? Just hope you don't accidentally waste that last one...
Very straightforward level, other than that, essentially another "hold right" kind-of level. I used all of my flips too, just because I can.
No point in comparing my 2018 run to this because there's no other method of beating the level faster (trying to corner clip on the left ledge is slower).
Level 9: Assembly Line
A symmetric level where you need to form some kind of an S-shaped pattern... twice? I dunno. But it's there, so make of it what you will; right-down, left-down, flip, right, up, left-up, right.
I also bash my head against the last conveyor belt to get closer to the door.
I improved over my 2018 run by three frames here; I added blank frames to the eight-frame jumps to jump lower before flip and turns, each jump being a frame faster.
- Left: at 3468, four-frame A → blank → four-frame A (flipped on 3504)
- Middle: at 3562, two-frame A → blank → six-frame A (turned on 3598)
- Right: at 3607, five-frame A → blank → three-frame A (turned on 3633)
Level 10: No Touching
No Touching? Missed the opportunity to call it "U Can't Touch This" instead, because that's what the level name reminds me of honestly. smh
Well... Anyway, this level is just that; there is no safe ground, ceiling, or wall. It's entirely filled with spikes. You need to fall down, flip up, then flip back down while avoiding the columns of spikes.
No change compared to my 2018 run.
Level 11: Jacob's Ladder
jakob Jacob is a strange kid. How did he build this ladder? And why?
This is basically a walljumping exercise like in High Dive, but you need to watch for the hanging spikes as well; looks like this calls for an excuse to make proper timings as well. Worse yet, you need to do it twice, the second time being upside-down. Or do you...?
This is a special kind of improvement I found when optimizing my run. Here, I flipped on the first ladder, then walljumped past the spike gap. Very precise. The earliest walljump possible was six frames before I made contact with spikes. 19 frames are saved over my 2018 run!
At 4024, one-frame A → five-frame blank → nine-frame A
Level 12: Timing is...
...practically nonexistent for this TAS... this time.
But let me tell you about this final level first. There is a O-shaped pile of spikes in the air. Its flickering cycle? On for four frames, off for 36 frames. Now, there are two timings you can make use of to get past this.
- Jump-flip immediately after the pile is toggled off, ignoring the safe spot in the center; this is very much a frame-perfect timing.
- Flip 16 frames after the pile is toggled off, putting you in the safe spot by the time it toggles back on; it's also frame-perfect unfortunately, but a bit friendlier as you don't need quick reflexes to press multiple buttons at the same time.
You'll have a slightly more open window if you choose to jump-flip to that spot instead, but it all depends on how long you'll hold the A button and when during the jump you'll press B.
I believe that's what makes this the hardest level thus far. But in this TAS, I made use of the first option, which was to jump and flip immediately after the pile is toggled off (4272 and 4273).
Here, I was able to corner clip in order to continue falling, which allowed me to barely graze the spikes and make my way to the door. No more waiting! :D
10 frames faster than my 2018 run; timing ends on the last input. On top of all this, I cleaned up the input on the levels where I didn't save any time.
Potential improvements?
None that I know of.
Additional thoughts?
This is a pretty underrated and short homebrew game, and I honestly think it could have a shot at being published now that I've optimized this run to the fullest.
It really isn't of me to have a go at a non-Mario game on the NES, but I couldn't help but notice that the skip for Welcome! was possible. It's only fair that I had to complete the rest of the game afterward.
Pretty glad to have this finished up now; I hope you enjoy!
Suggested screenshots?
Hmph, I'm not so sure about this one. I'd like for there to be a shot where a skip in a level can be seen, but of course, I only used three skips that I know of. Not sure where else would make for a neat screenshot, but I'm sure the publisher can have some kind of idea on how it'll play out (and of course, I respect the publisher's decisions about the screenshot in every way, like I always do).
Here goes...

Frame 271

Frame 1496

Frame 3993

Frame 4024

Frame 4308
nymx: Claiming for judging.
nymx: This a really nice VVVVVV style game. It looks highly optimized and I can't see how a another frame could be found (Famous last words! LOL)
Accepting.
