Joined: 7/9/2019
Posts: 27
Location: France
But the strange thing is that I uploaded for example a video on my private channel and it worked. And some months later, I uploaded the exact same video on my public channel but it failed. The problem is that now, I have this problem for the two channels. And as you can see, the 2nd video uses the settings recommanded by YouTube with a MP4 format and AAC for the audio, etc. Before, I always uploaded my videos with the MKV format and the audio in FLAC and I never had a problem ! But it seems that this problem is only with the videos in 2160p, not in 1080p. I'm stuck and can do nothing ! :-/ I didn't want to be off-topic. The problem is if I want to show you some things I tested, I need to do with this encoding issue. It was just to prevent.
Publisher
Joined: 4/23/2009
Posts: 1283
If you have the upload speed, why not try uploading simpler AVC video files. We usually upload without b-frames and a constant qp of 5. The encodes are faster but the file size are a lot bigger.
Joined: 7/9/2019
Posts: 27
Location: France
I'm sorry, but I'm not a pro with encoding :-/ I know all the video and audio formats, but for encoding, I'm a noob ! ^_^ It's why I simply use Handbrake with these settings for videos in 2160 at 60 fps : - Quality: CRF 11 - Video Codec: H.264 - Framerate: Same as source - Constant Framerate - Encoder Preset: VerySlow - Encoder Profile: High - Encoder Level: Auto I just know the basics. Edit : I found the problem. Handbrake put me the "Encoder Level" on "L6" with it on "Auto" when I used the "Encoder Preset" on "VerySlow" or "Slower". There is no problem with "L5.2".
Joined: 7/9/2019
Posts: 27
Location: France
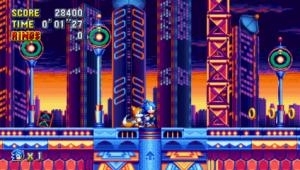
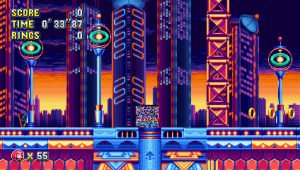
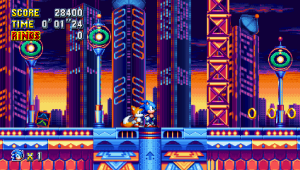
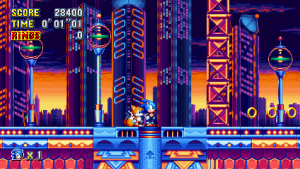
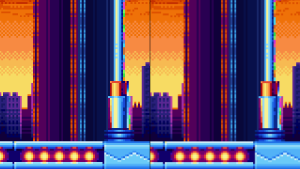
Hello, I have interesting things to tell... I think ! :-P I just bought "Sonic Mania" on Steam and I was curious to see how the scaling of the image and the filters work :-) In windowed mode, there are 3 scaling options : 1X, 2X or 3X. Tha native resolution is "424 x 240". There are a filter "None", a "Clean" (a bit more blurry than None) and 2 CRT filters. In fact, I was surprised to notice that the filter "None" isn't only a Point filter. As you can see here, even with a X1 scaling, the picture is a bit blurry (edit : in fact, it shouldn't be blurry, there is an issue with it on my desktop PC) : Note that there is no difference between the "None" and the "Clean" filters when the picture size is 1X or 2X. It begins with 3X. It's strange, because I had to search on Google to find a capture of the game in its native resolution without any blur : So, this little blur with the "None" filter is always active. Here is the game scaled 3X : And in fullscreen in 1080p : It's interesting to notice that the native resolution doesn't correspond exactly with a 16:9 aspect ratio, because : 424/240 = 1,7666666666666666666666666666667 But : 16/9 = 1,7777777777777777777777777777778 So the game has to be slightly stretched in fullscreen mode. I don't know if it's a bilinear filter that is used, something else or nothing. It's hard to compare with this blur. But at least, we can compare how the blur works ! ;-) I upscaled the original picture 3X with a Point resizer to achieve the 720p resolution (image left) and then compared it with the picture in-game (image right). The picture is zoomed at 400% : As you can see, if we observe a big pixel (which has 12 pixels here, because of the 3X scaling and the zoom at 400%), the part which is blurry is all around the pixel (to the left, the right, the bottom and the top) and correspond to 1/3 of the pixel (4 pixels on 12 pixels). If I show you this, it's because I think that this method of representation of the pixel art isn't bad and rather transparent. Maybe we can took our inspiration from this ;-) Who suspected there is a little blur in this game when there is no filter ? :-P The only problem is that I don't know what kind of blur it is... :-/
Publisher
Joined: 4/23/2009
Posts: 1283
It's a pretty new game, so I doubt it's using some old Windows rendering system that. I believe, Win7 started to introduce a blur upscaliling instead of point resize in WinXP. Unfortunately, I forgot what exactly was the problem, and I spent way too much on Google trying to find it (it was bugging me). Also, since your screenshots are of native resolution, so there would be no resizing and the problem I mention above wouldn't have existed anyway. TLDR: I don't know what's going on.
Joined: 7/9/2019
Posts: 27
Location: France
Sorry, but I'm not sure to understand all the meaning of what you said. It's a bit subject to misunderstanding :-/ I don't know if it's my message or the question of the blur that is disturbing you. If it was my message, I will just quickly explain one again. Only the 2nde picture is in a pure native resolution, without treatment ! I found it on Google. The 1rst is a screenshot in-game that I took. It is in the native resolution too (424 x 240), but there is a little blur added by the game itself. We see this blur for each size in-game ! It's not only a Point resize scaling as we would have expected. (3rd image : 1272 x 720 - windowed mode - window size 3X 4rth image : 1920 x 1080 - fullscreen mode - the windows size doesn't have any influence 5th image : "the 2nd picture, found on Google and upscaled 3 times with PointResize" vs. "a capture in-game with a window size of 3X" [zoom 400%]) I think the blur is a choice of the developers to not have absolute blocky pixels. It's why I found this interesting ;-)
Publisher
Joined: 4/23/2009
Posts: 1283
When I read your previous post above, my first thought is that the game blur is due to how later versions on Windows does on fly resizing which made it blurry. I was trying to explain that I forgot what circumstances are needed to have this happen, but I do know that it changed between Windows XP and Windows 7 (unsure about Windows Vista), and that it was only when an application used one of the older rendering system that Windows supports. Then, after a bit of unsuccessful Google-ing to jog my memory, I gave up and realized that Sonic Mania only recently came out and is highly unlikely to be using the older rendering system. Also the fact that the blur happens at native resolution also. I'm basically saying I had a random thought on why the game may be useful, and nothing useful came from it, that's all.
Joined: 7/9/2019
Posts: 27
Location: France
OK. I understand better now ! ;-) Interesting ! I didn't know ! Yes, it's strange ! And so do you think it depends exclusively on the version of Windows or was it a reasoned choice from the developers ? But maybe this kind of blur is in the engine of the game too, to render the pixels less square. Don't you think ? :-) Actually, I don't find this blur so bad, because without that, it's often too blocky. I wonder if it was voluntary from the developers or not. But if it was a choice, I found the use of this blur rather interesting. It's why I wanted to talk about it here.
Publisher
Joined: 4/23/2009
Posts: 1283
It's solely depended on what Windows version you were using, as far as I know. At native, it shouldn't be blurry IMO, since it's the original pixel art. We're kind of getting off topic now though, so I think if we want to continue the blurry conversation, a new topic should be made.
Joined: 7/9/2019
Posts: 27
Location: France
Yes, I didn't want to be off-topic. I thought this blur interesting and that it was a choice from the developers. My goal was in fact to use this as a model for a new AviSynth script ;-) I will continue to do researches for my part, to know if this blur is voluntary or not too.
Joined: 7/9/2019
Posts: 27
Location: France
Hello, I just come back to tell you that I have succeeded in reproducing the look of Higan :-) It's exactly the same thing, to the nearest pixel (but without the colors filter) ! :-P This will complete the list of the experiments with AviSynth scripts that there are on the 1st page on this topic, if you are interested of course ! ;-) In fact, I wanted to reproduce the look of "Sonic Mania", but it wasn't successful ! I got some help on the Doom9's Forum. However, it was enough to be able to reproduce the style of Higan :-D So, to begin, here is an exact reproduction of the look of this game with Higan in the original aspect ratio of 8:7 :
Language: AviSynth

A=Avisource("G:\name_of_the_file.avi").convertToRGB24.PointResize(512, 448).AddBorders(0, 16, 0, 16) # the picture resolution is doubled and black borders are added to achieve the 480p resolution x = -1.0 # this shift the picture to the left y = 0.0 OP= 0.5 # the blend ratio B=PointResize(A,A.Width,A.Height,-x,-y,A.Width,A.Height) A.Overlay(B,Opacity=OP) # the shifted image and the original image are blended together BilinearResize(1024, 960) # the picture resolution is doubled with a bilinear filter
Here is the same picture with an aspect ratio corrected with a bilinear filter, like Higan does :
Language: AviSynth

A=Avisource("G:\name_of_the_file.avi").convertToRGB24.PointResize(512, 448).AddBorders(0, 16, 0, 16) # the picture resolution is doubled and black borders are added to achieve the 480p resolution x = -1.0 # this shift the picture to the left y = 0.0 OP= 0.5 # the blend ratio B=PointResize(A,A.Width,A.Height,-x,-y,A.Width,A.Height) A.Overlay(B,Opacity=OP) # the shifted image and the original image are blended together BilinearResize(1170, 960) # the picture resolution is doubled and the aspect ratio corrected with a bilinear filter
In addition, we can upscale the image in a 2160p resolution, for example with a "Spline36" resizer (the one I prefer, because it's equivalent to "Lanczos3", but with less ringing and artefacts) or a "Lanczos3" resizer : I use the "Resize8" plugin because it uses an anti-ringing filter : http://avisynth.nl/index.php/Resize8 (But be careful ! Other defaults can appear with the anti-ringing, if the scaling factor is too high)
Language: AviSynth

Resize8(2632, 2160, kernel="Spline36", kernel_c="Spline36")
Or we can remove the black borders too :
Language: AviSynth

A=Avisource("G:\name_of_the_file.avi").convertToRGB24.PointResize(512, 448) # the picture resolution is doubled x = -1.0 # this shift the picture to the left y = 0.0 OP= 0.5 # the blend ratio B=PointResize(A,A.Width,A.Height,-x,-y,A.Width,A.Height) A.Overlay(B,Opacity=OP) # the shifted image and the original image are blended together BilinearResize(1170, 896) # the picture resolution is doubled and the aspect ratio corrected with a bilinear filter Resize8(2820, 2160, kernel="Spline36", kernel_c="Spline36")
I know that some of you will find this blurry, but it's like Higan does. I will finish with the question of the aspect ratio, or rather remind what I found, to stay within the theme of the topic ;-) Higan use the same aspect ratio for the Super Nes games that the one which is in this list here : https://pineight.com/mw/?title=Dot_clock_rates I will quote some things that I said (sorry for the narcissism ^_^ ) to help you to understand :
SuperLumberjack wrote:
And so, we calculate the new resolution like this : 256 x (8:7) = 292, 57 In fact, the original ratio of 8:7 correspond to : 256 x (1:1) = 256 Otherwise, you can simply do this : (64:49) x 224 = 292,57 With the standard 4:3, we get this : (4:3) x 224 = 298,66 And with the original 8:7 aspect ratio this : (8:7) x 224 = 256 Finally, with a 4:3 AR on a modern screen, we need to choose the resolution : 292 x 224 or 293 x 224 Higan proposes these resolutions in 4:3 : - Small : 585 x 448 (585 x 480) - Medium : 877 x 672 (877 x 720) - Large : 1170 x 896 (1170 x 960) And the Super Nes Classic Mini proposes a resolution of "877 x 672" too (1280 x 720 with borders).
Publisher
Joined: 4/23/2009
Posts: 1283
Okay, I took the time to finally understand why you are using 8:7 PAR to figure out the AR resolution. I got most of my understanding from here and here. Bottom line? It's subjective. But if you want to somewhat emulate (since no CRT TV does the signal the same) what it looks like on old CRT TVs, I think 4:3 DAR is the way to go since it's really easy. Doing PAR method has a couple of problems. 1. We don't actually know what the devs intended 2. It's different per game per system 3. Even in the same game, some sprites were corrected, others were not, so that there is no perfect method I'm sure someone else besides me has already done the research here and why we are going for 4:3 DAR, but this was new (or I completely forgot) to me and I had a lot of fun learning about this. Of course, you are free to choose your own preference, SuperLumberjack, and share with us your varies methods to AR correct using PAR method. Which, by the way, is awesome to see you have figured out how Higan did it! =)
Joined: 7/9/2019
Posts: 27
Location: France
Yes, I know this video ! The channel is great, with very good explanations ! ;-) It's why for some games like "Super Metroid", "Mr. Nutz" or "Super Mario World" for example, I keep the 8:7 aspect ratio, because lots of elements are thought to be in this AR :-) For the others like the "Donkey Kong Country" games for exemple, I use the 4:3 AR (the coins in these games are for example designed to be stretched in 4:3 and it looks more natural). The link you posted is interesting too, because it joins what it was said in the link I posted above. For the 3rd case you exposed, yes, that's true, some games have elements thought to be stretched in 4:3 and others that were not. In this case, I generally choose the 4:3 AR. But even in Super Metroid there are for example 1 or 2 elements are thought to be stretched in the 4:3 AR like the planet Zebes at the beginning I think. But it's not perfectly circular, with a 4:3 AR or a 8:7 and the big majority of the elements of the game (like the morph ball) are in 8:7, so for me, this game is in 8:7 :-P In addition, I don't think that the developers calculate to the nearest pixel what it will give with the 4:3 AR. I have the impression that everything was rather approximate :-/ It's strange that even Nintendo, with the Super Mario games, forgot totally to design them for a 4:3 AR while it was the standard. So I personnally choose what AR is the best for each game :-) I choose the best compromise ! ^_^
Joined: 7/9/2019
Posts: 27
Location: France
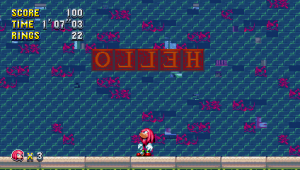
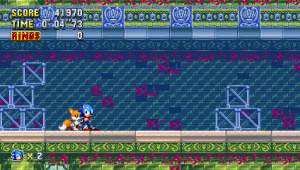
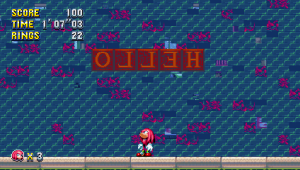
Hello again :-) I just come back here, because I succeeded in my goal to reproduce the "None" filter and the "Clean" filter of Sonic Mania with a great help from a guy on the Doom9's Forum :-D I just failed in the 1080p resolution in fullscreen :-( I don't know what algorithm the game uses to put the picture in fullscreen, but it's more precise than a PointResize filter and a lot less blurry than with a LanczosResize filter (don't forget than the picture has to be streched a bit). But for the picture scaled 1X, 2X and 3X, it works and the "None" filter is applied in the exact same way ! The "Clean" filter is only available with the 3X scaling in-game, but it's the same principle. Here is my source image (that I still found on internet, because the filters are active in-game) : A screenshot in-game that I took in windowed mode with window size 3X and the "None" filter (edit : it shouldn't be blurry) : And the "None" filter that I reproduce with an AviSynth script :
Language: AviSynth

A=Imagesource("H:\source image.png",end=0).convertToRGB24 A=A.PointResize(1272, 720) ## None Filter x = 1.0 y = 0.0 OP= 0.25 B=PointResize(A,A.Width,A.Height,-x,-y,A.Width,A.Height) A.Overlay(B,Opacity=OP) A=Last # Make A as above x = 0.0 y = 1.0 OP= 0.25 B=PointResize(A,A.Width,A.Height,-x,-y,A.Width,A.Height) A.Overlay(B,Opacity=OP)
Screenshot in-game windowed mode 3X with the "Clean" filter : The "Clean" filter reproduced with an AviSynth script :
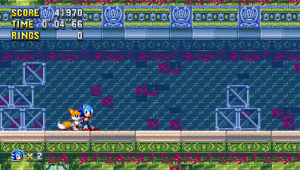
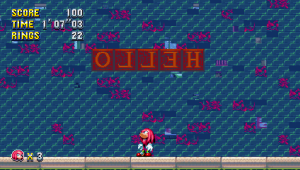
Language: AviSynth

A=Imagesource("H:\source image.png",end=0).convertToRGB24 A=A.PointResize(1272, 720) ## Clean Filter x = 1.0 y = 0.0 OP= 1.0/3.0 B=PointResize(A,A.Width,A.Height,-x,-y,A.Width,A.Height) A.Overlay(B,Opacity=OP) A=Last # Make A as above x = 0.0 y = 1.0 OP= 1.0/3.0 B=PointResize(A,A.Width,A.Height,-x,-y,A.Width,A.Height) A.Overlay(B,Opacity=OP)
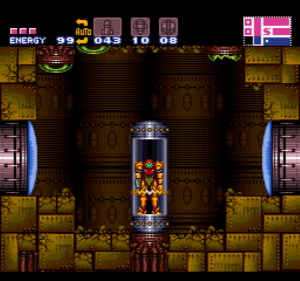
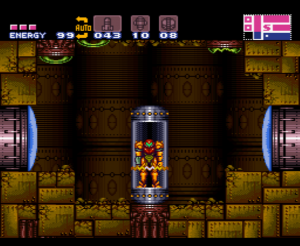
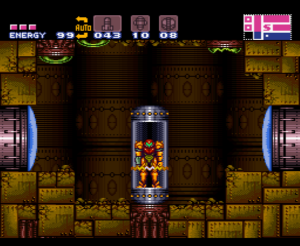
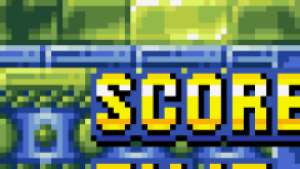
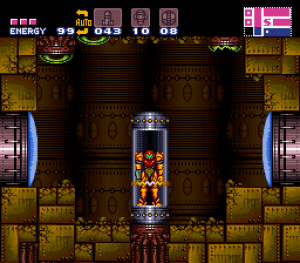
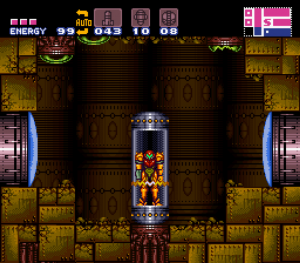
But what's really interesting is this game is the "Fullscreen mode". I would even say that it is amazing, because I totally failed to try to recreate it ! Indeed, it looks like if there wasn't any interpolation to display the picture ! I tried with a PointResize filter, but it didn't match : Here is the image in-game zoomed : And my reproduction with the PointResize filter : But as you can see, it's less accurate... You can even try with a LanczosResize filter, it will look blurry and inaccurate. But the most interesting thing about the game, to return to the subject of the thread, is that the picture has in addition to be stretched a bit, because the aspect ratio of the game isn't a perfect 16:9 AR. So, could somebody explain to me how the developers did to create this miracle ? :-P I'm really interested, because it looks like a perfect solution ! :-) It's good to scale the image by a non integrer number and to display the image with another aspect ratio apparently. Bonus : Super Metroid with a Simple 3X filter only : Super Metroid 3X with the "None" filter of Sonic Mania (it's wrong, because it already wasn't correct in Sonic Mania on my desktop PC) : Note : You just need to put this at the beginning of the script :
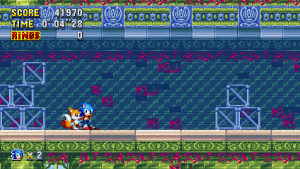
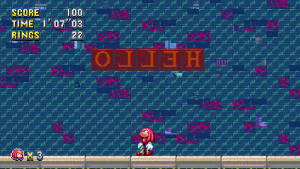

Language: AviSynth

A=A.PointResize(768, 672)
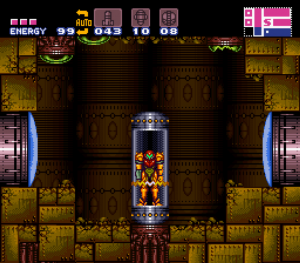
The rest is always the same. Super Metroid 3X with the "Clean" filter of Sonic Mania : I find this really interesting ! :-) Personnally, it's the "Clean" filter that I prefer ! Edit : You were right Aktan, the picture shouldn't be blurry with the filter on "None", even with the windowed mode. Because on my laptop, I didn't notice any blur in Sonic Mania with no filter. So there is a strange problem with Sonic Mania on my desktop PC with the filter on "None" in the windowed mode.
Joined: 7/9/2019
Posts: 27
Location: France
I think that I found ! :-) For the fullscreen mode of Sonic Mania, I think it's simply this with the "None" filter (with extremely subtle differences, but finally negligible) :
Language: AviSynth

Imagesource("H:\source image.png") ## 1080p None Filter PointResize(1696, 960) # Simple 4X BilinearResize(1920, 1080)
I was too focused on the perfection of the reproduction and the technic with the blended images ^_^ So in fullscreen it's another technic, the picture needs to be upscaled 4X with a PointResize filter and then, it's simply a bilinear filter to achieve the 1080p resolution ! And for the "Clean" filter, it's simply that :
Language: AviSynth

Imagesource("H:\source image.png") ## 1080p Clean Filter PointResize(848, 480) # Simple 2X BilinearResize(1920, 1080)
So, there is no magic ! :-P However, the scripts that I posted above are still correct for the windowed mode of the game. To conclude, I will just say as I said before, that really I think that the Bilinear filter is the best to smooth the image and correct the aspect ratio of these old games. It's the most natural I find ! I tried with Bicubic, Lanczos, Spline36, etc., but the ringing... ugh ! And with the anti-ringing filter, it's strange ! In fact, I would only use one these filters to upscale a high resolution image to a higher resolution (Spline36 + anti-ringing personally). But for the low resolution image, I think the bilinear filter is better. So, I still prefer the "Clean" filter in "Sonic Mania", with the resolution doubled with a Point resize filter and then the picture upscaled to the 1080p resolution with the bilinear filter. Oki ! End of the story ! :-D Edit : I changed my mind and finally have adopted the "None" filter, because with some phases of gameplay, it's easier when you see better ! ^_^ And it's more clean in fact (than the "Clean" filter...). But is just for playing ! Because even in 2160p, I would prefer the association of a "Simple X4" filter with a bilinear filter, than simply a "Simple X8" or "X9" filters, too blocky I find and therefore unsightly. In fact, I tried with lots of low resolution images (224p, 240p, 480p...) and for me the ideal would be to have the half of the output resolution with the PointResize filter and then achieve the output resolution with the Bilinear filter. In a perfect world, it would be the perfect compromise I think (particularly with 480p contents). If I take for example a Super Nes game with a resolution of "256 x 224", in the ideal I would like to get this :
Language: AviSynth

Imagesource("H:\source image.png") PointResize(1024, 896) BilinearResize(2048, 1792)
Or this still for example :
Language: AviSynth

Imagesource("H:\source image.png") PointResize(2048, 1792) BilinearResize(4096, 3584)
But it's not the ideal for our current standards. So in 2160p, this is better, with the correction of the aspect ratio in addition :
Language: AviSynth

Imagesource("H:\source image.png") PointResize(1024, 896) BilinearResize(2820, 2160)
Si it's still equivalent to the Clean filter of Sonic Mania. But the only problem is that it seems a bit too blurry in 1080p. But with a 2160p resolution, I'm sure it's perfect ! ;-) I know it's a question of tastes, but I think it's the ideal for the old games ! For the modern 2D games in pixel art, it's another story... With recent games like "Celeste" or "Axiom Verge", I would never have the idea to use a Bilinear filter, and a pixel perfect mode is of course better ! But as I said before, these new games were thought to be displayed on modern screens, whereas the old weren't ! And I think that lots of people know how the blurriness of some cables and screens were important to have some proper effects in lots of these games with the dithering for example, etc. The interesting posts concerning the subject of the thread (the aspect ratio correction) : http://tasvideos.org/forum/viewtopic.php?p=486114#486114 (the end of the post) http://tasvideos.org/forum/viewtopic.php?p=486163#486163
Post subject: Setting the DAR versus pixel stretching for YouTube encodes
slither
He/Him
Player (26)
Joined: 12/27/2020
Posts: 3
Most, if not all high definition encodes with aspect ratio correction on YouTube currently stretch the pixels, and I have conducted a test with FFmpeg to see whether setting the DAR produces better results. Both video clips are exactly 10 seconds in length. The FFmpeg commands used are as follows: For setting the DAR, ffmpeg -i input.avi -c:v libx264 -crf 18 -c:a copy -pix_fmt yuv420p -s 5120x4480 -sws_flags neighbor -aspect 4:3 dar.mkv For pixel stretching, ffmpeg -i input.avi -c:v libx264 -crf 18 -c:a copy -pix_fmt yuv420p -s 5760x4320 -sws_flags neighbor stretching.mkv Immediately after encoding, the filesize difference is apparent. The video with the DAR set was 3 014 432 bytes, while the one that stretched the pixels was 6 194 974 bytes. This is due to H.264's block-based encoding. After uploading it to YouTube and letting it process, what I have noticed is that both videos have been reencoded to VP9 + Opus from the initial output, which was H264 + PCM, and the video which set the DAR was reencoded to 5704x4480. After using ytdlp to download those files, the file with the DAR set (6 802 718 bytes) was still smaller than the one with the pixels stretched (7 063 149 bytes), even though it was resized. The reencoded videos were still in the YUV420 colourspace. Quality-wise, setting the DAR is much better before YouTube's reencode due to chroma subsampling, however after the reencode the gap is narrowed much more, with the pixel-stretched video having only small artifacts due to nearest-neighbor scaling by a non-integer factor. In conclusion, due to the much smaller filesize and negligible quality loss after YouTube's reencode, I would prefer setting the DAR over pixel stretching.
slither
He/Him
Player (26)
Joined: 12/27/2020
Posts: 3
Forgot to post links to the videos. Setting DAR: https://www.youtube.com/watch?v=VHCIp5kPn4s Pixel Stretching: https://www.youtube.com/watch?v=WD2uE6lA2RI
Publisher
Joined: 4/23/2009
Posts: 1283
Interesting, but how did you do the pixel stretching method? Please post your script. The reason why we don't use the flag is control. If we stretch it ourselves before sending to YT, we have control on how the stretch would take place. It's because we did the stretch already that causes the filesize to increase. This is a given. Depending on how YT does the stretch, it could end up with a smaller file size than how we do it, since the method we stretch is suppose to be an higher quality stretch.
Site Admin, Skilled player (1250)
Joined: 4/17/2010
Posts: 11468
Location: Lake Char­gogg­a­gogg­man­chaugg­a­gogg­chau­bun­a­gung­a­maugg
slither wrote:
Forgot to post links to the videos. Setting DAR: https://www.youtube.com/watch?v=VHCIp5kPn4s Pixel Stretching: https://www.youtube.com/watch?v=WD2uE6lA2RI
Actually, to properly compare things we need to see how it works with footage like in these 2 games: 560x288: [3594] PSX Crash Bandicoot 2: Cortex Strikes Back by Chef_Stef in 36:06.78 160x224: [3662] A2600 Dragster by MrWint & Omnigamer in 00:08.39
Warning: When making decisions, I try to collect as much data as possible before actually deciding. I try to abstract away and see the principles behind real world events and people's opinions. I try to generalize them and turn into something clear and reusable. I hate depending on unpredictable and having to make lottery guesses. Any problem can be solved by systems thinking and acting.
slither
He/Him
Player (26)
Joined: 12/27/2020
Posts: 3
Aktan wrote:
Interesting, but how did you do the pixel stretching method? Please post your script. The reason why we don't use the flag is control. If we stretch it ourselves before sending to YT, we have control on how the stretch would take place. It's because we did the stretch already that causes the filesize to increase. This is a given. Depending on how YT does the stretch, it could end up with a smaller file size than how we do it, since the method we stretch is suppose to be an higher quality stretch.
I posted the ffmpeg commands used in the test, I simply did a nearest neighbor scale to the intended resolution. I think testing a stretch directy to 5974x4480 should be tried as well, as this scales the height by an integer.
Publisher
Joined: 4/23/2009
Posts: 1283
slither wrote:
I posted the ffmpeg commands used in the test, I simply did a nearest neighbor scale to the intended resolution. I think testing a stretch directy to 5974x4480 should be tried as well, as this scales the height by an integer.
Whoops, I didn't read closely enough, my bad. Well, we aspect ratio correct in a different way than your ffmpeg command. I think we upscale to a resolution that is close to the aspect ratio correct resolution and then resize to the aspect ratio correct resolution with a different resizer like lanczos. This will eliminate all the artifacts you saw.
Zinfidel
He/Him
Player (205)
Joined: 11/21/2019
Posts: 247
Location: Washington
In response to changes being made to the official encoding package to make it simpler, here are some colorspace tests. Control image: Test 1: Do we need to convert from RGB to YV24 to YV12 to preserve quality, versus converting directly from RGB to YV12? The script has had this "double" conversion for some time now, and Aktan recalls that it was likely originally done because there was a bug in AviSynth that caused direct conversions to YV12 (4:2:0) to either ignore parameters, or suffer some other type of quality loss. There is mention of an issue that sounds quite similar in official Avisynth documentation on this page: http://avisynth.nl/index.php/Sampling#RGB_-.3E_YUY2_conversion. Relevate quote:
(In v2.58, the [0 1 1] kernel was used to interpolate chroma. This is technically wrong and results in a 0.5 pixel right shift of the chroma, but it was originally done for performance reasons.)
Language: AviSynth

wide = AviSource("E:\xtreme\2Xtreme.avi") wide1 = wide.ConvertToYV12(chromaresample="point") wide2 = wide.ConvertToYV24(chromaresample="point").ConvertToYV12(chromaresample="point") # Extract chroma planes for comparison since luma should remain unaffected and will make comparison more difficult. wide1.ExtractU() wide2.ExtractU()
RGB -> YV12,Point RGB -> YV24,Point -> YV12,Point XORing these planes together in Paint.net yields a uniformly black (0,0,0) image, meaning that the planes are identical, and the trip through YV24 did not make a difference. Let's test the internal order of operations of the convert functions to ensure that the transfer function is performed first, then resizing.
Language: AviSynth

wide = AviSource("E:\xtreme\2Xtreme.avi") wide3 = wide.ConvertToYV24(chromaresample="point").ConvertToYV12(chromaresample="lanczos") wide4 = wide.ConvertToYV12(chromaresample="lanczos") wide3.ExtractU() wide4.ExtractU()
RGB -> YV24,Point -> YV12,Lanczos RGB -> YV12,Lanczos XORing these planes together in Paint.net yields a uniformly black (0,0,0) image, meaning that the planes are identical, and that converting directly to YV12 preserves the desirable order of operations. Test 2: Increasing bit depth prior to color space conversion, dithering, and other assorted goodies courtesy of Aktan. Aktan provided a technique for colorspace conversion that might improve accuracy:
Language: AviSynth

AviSource("E:\xtreme\2Xtreme.avi") # Assume RGB32 source ConvertToRGB64() # ConvertToYUV444(matrix="Rec709", chromaresample="point") # Might be needed? Needs testing ConvertToYUV420(matrix="Rec709", chromaresample="lanczos") # Conversion from 16-bit RGB to YUV 4:2:0 16-bit ConvertBits(bits=8, dither=0) # Reduce back to 8-bit color with dithering, bits=10 for our encodes in 10-bit color ExtractU()
Code as posted produces: Code with optional conversion to YUV444 enabled: XORing these planes together shows that they are identical, so the trip to 444 (as with the previous test) appears unnecessary. Here is the full image using Aktan's method: Here is the full image, converted directly to YV12 with Lanczos: Here is the XOR of these two images: Very unsurprisingly they are different (there is dithering going on). No conclusion, subjective difference would have to be examined. Take the two images into paint.net, put them on separate layers, and switch between them if you want to try to determine which is subjectively better.
Site Admin, Skilled player (1250)
Joined: 4/17/2010
Posts: 11468
Location: Lake Char­gogg­a­gogg­man­chaugg­a­gogg­chau­bun­a­gung­a­maugg
Sorry I didn't mention it right away. The reason I suggested testing this on 512px mode of PSX and/or A2600 is to see how it compares after ARC. Because ARC is what makes them inherently not pixel-perfect. And heavy ARC is what may kill things really hard (slight fractional ARC too tho). But since we don't target 1x anymore, it also has to go 2x with pixel first, and then shrink or stretch width without changing height, because height isn't meant to be stretched by fractional factor. Finally, this test image has a lot of almost-white on a lot of almost-black, which means color changes are almost pure luma too. Good comparison would be going from chroma to no chroma (or vice versa), because detail loss is the most apparent there. As long as there's a lot of chroma, even changes from one chroma color to another won't make the loss apparent. EDIT: I'm switching between the 2 resulting images above at 1000% zoom I can't tell which one is better.
Warning: When making decisions, I try to collect as much data as possible before actually deciding. I try to abstract away and see the principles behind real world events and people's opinions. I try to generalize them and turn into something clear and reusable. I hate depending on unpredictable and having to make lottery guesses. Any problem can be solved by systems thinking and acting.
Zinfidel
He/Him
Player (205)
Joined: 11/21/2019
Posts: 247
Location: Washington
feos wrote:
Sorry I didn't mention it right away. The reason I suggested testing this on 512px mode of PSX and/or A2600 is to see how it compares after ARC. Because ARC is what makes them inherently not pixel-perfect. And heavy ARC is what may kill things really hard (slight fractional ARC too tho). But since we don't target 1x anymore, it also has to go 2x with pixel first, and then shrink or stretch width without changing height, because height isn't meant to be stretched by fractional factor. Finally, this test image has a lot of almost-white on a lot of almost-black, which means color changes are almost pure luma too. Good comparison would be going from chroma to no chroma (or vice versa), because detail loss is the most apparent there. As long as there's a lot of chroma, even changes from one chroma color to another won't make the loss apparent. EDIT: I'm switching between the 2 resulting images above at 1000% zoom I can't tell which one is better.
My turn to apologize: I was going to test chroma subsampling filters in the previous post but never got to it. That's why I've got the 512px game. The above tests were only to test if multiple color conversions were necessary any more (go through YV24 first, for instance).
Language: AviSynth

AviSource("kain.avi") # 560x240 (512,240 framebuffer) PointResize(1120, 480).LanczosResize(640, 480) one = ConvertToYV12(chromaresample="point", matrix="rec601") two = ConvertToYV12(chromaresample="lanczos", matrix="rec601") #Aktan's method ConvertToRGB64() three = ConvertToYUV420(matrix="rec601", chromaresample="point").ConvertBits(bits=8, dither=0) four = ConvertToYUV420(matrix="rec601", chromaresample="lanczos").ConvertBits(bits=8, dither=0) ExtractV()
Control YV12, Point YV12, Lanczos Aktan's Method, Point Aktan's Method, Lanczos After doing this, I realize that this game as probably a bad pick for this because it's dark and kind of dull. For this type of content (full 3D), the differences between point and lanczos sampling is nearly indistinguishable to me. Aktan's method vs straight to YV12 has differences that are a little more different though - if you zoom in a LOT, you can see that there seems like a very slight increase in contrast for the strictly YV12 route, vs smoother gradients in Aktan's (expected because of dithering). The difference is very small though and you've gotta squint. I think that this sampling may have a bigger effect for pixel-y games. Anyone want to recommend a 2D, 512px mode PS1 game? Someone should test A2600.
Site Admin, Skilled player (1250)
Joined: 4/17/2010
Posts: 11468
Location: Lake Char­gogg­a­gogg­man­chaugg­a­gogg­chau­bun­a­gung­a­maugg
At 500% zoom I notice that some parts of the BG become a tiny bit blurrier, but I can't notice any difference in quality between all the encoded converted variants.
Warning: When making decisions, I try to collect as much data as possible before actually deciding. I try to abstract away and see the principles behind real world events and people's opinions. I try to generalize them and turn into something clear and reusable. I hate depending on unpredictable and having to make lottery guesses. Any problem can be solved by systems thinking and acting.